


|
Ann Craig's Almost Traditional Christmas Scrap PageI created this Scrap Page at my scrapping group last night, so that I could show the participants different ways of using the scrap map I'd provided. I wanted to try an "antique" page with a modern flavour. Yes, that is a contradiction, but I 'm not usually restricted by too many boundaries, so........ I used my iPhoto tools to change the pictures to sepia tones and then faded the edges. All very simple on a Mac. Then I dragged the images into a Word document so I could change the sizes and positions, printed the photo and trimmed the edges. That was the easy part! You might like to refer to the other Christmas Scrap Page that uses the same scrap map, and you'll see that the map has been reversed, some dimensions changed and different embellishments used. Speaking of Embellishments I've taken advantage of some elements from a Stampin' Up Simply Scrappin' Kit on this page. They are already printed for you onto self adhesive card stock, so all you do is peel and stick. Great time savers if you've got loads of pages, and the kits come with coordinating card stock, patterned papers and the embellishments.
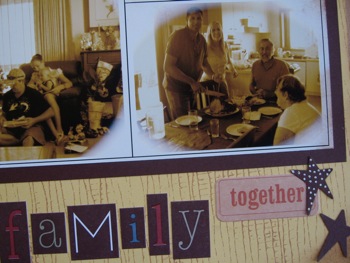
The words "Family" and "together" are from the Simply Scrappin' Kit, while the stars are punched out of chocolate chip card then individually patterned with a white gel pen. Notice how well the SS Kit colours coordinate with the Chocolate Chip card I've used to frame the photos. If YOU haven't tried Stampin Up products yet, you are missing out on the most well coordinated crafting system available. The next photo shows you some other embellishments on the Scrap page.
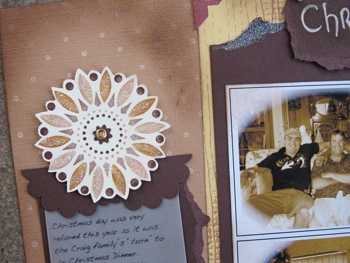
I adore this mandala styled stamp that belongs to the Friendly Flowers set from the Summer Mini Catalogue. Go ahead and browse the catalogue, and if you see something you like contact me and I'll order it for you. I've used the Stampin' Up Stampin' Write Markers to colour directly onto the rubber of the image so that I could get some variety in the design. This is an easy technique that allows you to print multiple colours at the one time. Some areas were then highlighted with a 2 way glue pen and sprinkled with Dazzling Diamonds Glitter. The decorative edge of the journalling topper is made by punching out a Scallop edged circle, cutting it in half and overlapping it a little to fit. The dotted background was made by inking Craft Vanilla onto the Polka Dot Background Stamp and printing onto Creamy Caramel Textured Card stock. Here is the final page.
This Scrap Page was softened by sponging Close to Cocoa Classic ink randomly along the edges. The top title was hand written with the White Gel Pen and then sponged over with ink. It was great to see other very different solutions to the Scrap Map I provided. Variations included the number of photos, colours used and the types of embellishments. As with all things crafty - YOUR OWN SOLUTION IS ALWAYS THE BEST FOR YOU! Keep checking back for more Scrap Page Layout ideas. My classes are once a month, but I'll post more as I complete them. See other ideas for a Scrap Page here.
|

