|
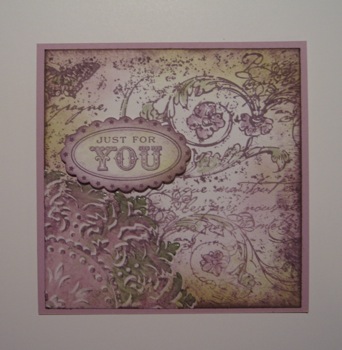
Vintage Medallion Card
This vintage card is a step away from my usual style - I always enjoy looking at this style of card that evokes feelings of bygone days, but usually fear trying it for myself. We have our Stampin Up Convention in Australia the weekend after next and as I've been overseas and interstate for much of the last 6 weeks, I hadn't even thought of what I'd prepare for my swaps. I started on some brayered cards but making even 50 of them would have taken me weeks, so I decided to use my new wheel called Very Vintage. You'll find it in the Autumn/Winter Mini along with lots of other fantastic new products. Here is the finished version of the swap I made for 2010.
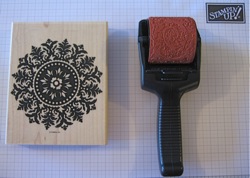
And here is the step-by-step tutorial. PRODUCTS USED Stamps Medallion, Very Vintage Jumbo Stampin Around Wheel. Card stock:- Whisper White, Pale Plum. Ink:-Pale Plum, Perfect Plum, Always Artichoke, Old Olive. Perfect Plum Jumbo ink cartridge. Accessories:- Blender Pen, Stampin' sponge, scallop oval punch, Stamp-A-Majig, clear embossing powder, heat tool, dimensionals, Jumbo wheel handle.
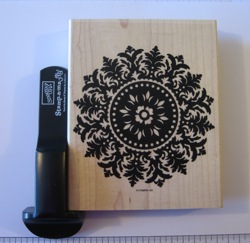
Assemble the Jumbo Stampin Around Wheel by inserting the ink cartridge and the stamin' wheel. You could use your Classic Stampin pad with the roller, but you save heaps of time by using a cartridge.
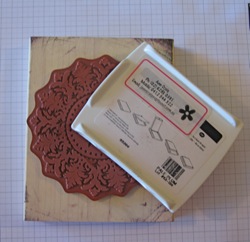
Commence inking the Medallion stamp by applying Pale Plum ink first. Apply in a patting motion, lying the stamp flat on the table. Next apply Perfect Plum to the perimeter of the stamp plus a few random pats to distribute the colour across the design. Finally add the Always Artichoke ink. Be selective with this as you don't want a solid rim around the edge. Just pat here and there - change the angle of the ink pad to get colours spread around. (see next photo)
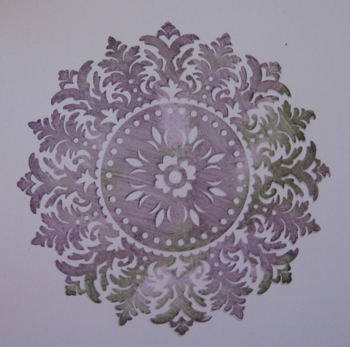
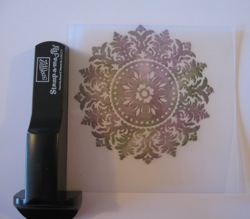
Use one sheet of Whisper White A4 card stock and the Stamp-a-majig (SAM) to position the Medallion image centrally on the page. HINT I use Stampin' Up! grid paper to give me an idea of where centre is. Take note of where the SAM guide is placed (for me it was at 7cm from the LHS) I used the SAM here so that it would be easier to re-position the image when I added the Versa Mark.
Next ink up the medallion stamp with Versa Mark and align directly over the stamped image. Sprinkle generously with clear Embossing Powder, shake off excess. Make sure the edges of the medallion are covered. Apply heat until the embossing powder is shiny and melted.
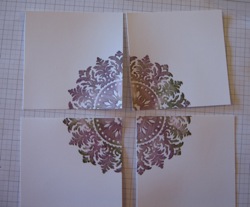
Cut the Medallion into four equal pieces, then trim the white card stock to size. I used 10 x 10 cm as I planned on a square card and those dimensions fitted well.
Prime the Stampin Around Wheel with ink by rolling it along some scrap paper. Roll across the card 3 times starting in the centre - just go right over the top of the embossed image. Doing 3 runs gives you more variety in the background pattern you are creating.
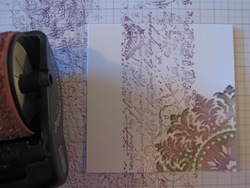
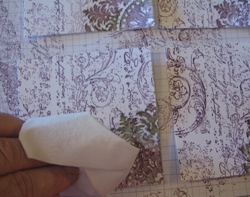
Buff the ink off the embossed image using a tissue. It will come off easily and leave a little of the ink on some white sections of the card. This helps with the Vintage look.
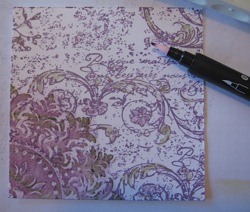
Make an ink well in the lid of your classic stampin' pad by squeezing the top and bottom together. Use a Blender Pen to pick up the ink and colour selected areas of the background pattern with both Always Artichoke and Perfect Plum ink.
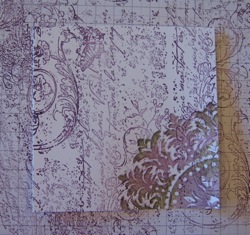
Now comes the part that makes this look old or "vintage". Sponge the edges of the card and some areas on the card with Pale Plum ink. Next sponge smaller areas of Old Olive ink. I've used Old Olive here rather than Always Artichoke as I wanted a lighter effect and the yellowish tinge in the olive does that much better than the Artichoke. Finally, mat your stamped creation onto Pale Plum card, create a greeting, distress and age the edges and adhere to the card with dimensionals. Go from Vintage Card tutorial to other tutorials
|