|
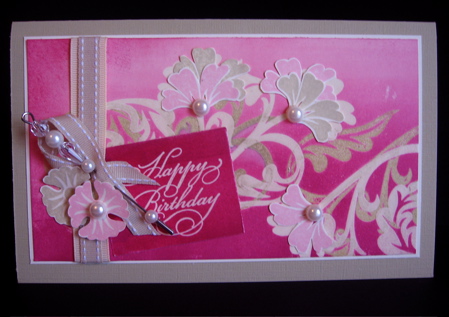
The Emboss Resist Technique Works Very Well When Using A Brayer To Complete the Background.I decided to have a go at brayering with some emboss resist yesterday. I needed to make a card for my youngest daughter's birthday, and had envisaged something in pinks (one of her favourite colours) and pearls. Now my youngest daughter is not all that young - as she says 26 for the 2nd time , and she is staying there for a while! The lovely Brocade Basics stamp set from Stampin' Up! is fast becoming one of my most used sets. I love the Art Nouveau influence in the design of this set - the beautiful fluid curves and stylized floral shapes enable lots of different interpretations when used in rubber stamping. Here is the card I came up with:
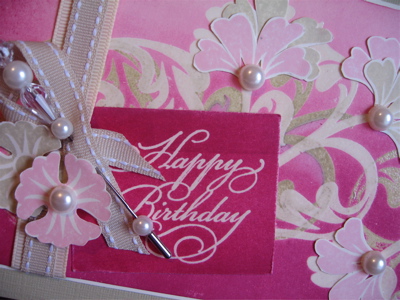
All Images © Stampin' Up!, Art work by Ann Craig. I struggled a bit with this card - it was not working too well, but with a bit of experimenting, and reverting back to thinking about colours - it ended up OK. These are the supplies I used to make the card. Vanilla Card Stock, Versa Mark ink, Embossing Buddy, Clear Embossing Powder. Powder Pal Trays, Pretties Kit, 1.6 cm Grosgrain Ribbon (Vanilla), Double Stitched Ribbon (River Rick), Stamp-a-ma-jig, Mini Glue Dots, Textured Card Stock (River Rock), Classic Ink - River Rock, Pretty in Pink, Purely Pomegranate. The Emboss Resist was achieved by inking with Versa Mark and stamping the main stamp from Brocade Basics directly onto the vanilla card stock. It was embossed with clear embossing powder. Then I re-inked the stamp with Versa Mark and River Rock and stamped at slightly different angles. Again the image was embossed with clear embossing powder. I used the Stamp-a-ma-jig to align the flower heads, and I clear embossed them as well. In addition I stamped more flower heads in River Rock and Pretty in Pink, on a separate piece of vanilla card stock. Next it was time to try out my brayering technique - I definitely need more practice in this, but it was OK for a first try. I started by using the brayer to apply Pretty in Pink all over the page, then I added some Purely Pomegranate on top of the lower half of the design. I did help it along a little with some sponging in the top RH corner. I nearly forgot that you need to buff over the image with some paper towel to remove the excess ink from the emboss resist areas, and it was amazing how much better it all looked afterwards. Cut out and add some layers of flower heads in different colours, offsetting them a little to look like clusters. Add half pearls, ribbons, and a greeting, then matt the design with vanilla card and adhere to the textured River Rock card.
All images © Stampin' Up! artwork by Ann Craig. I enjoy this technique and can see myself using it a lot more in the future. If you would like to know more detail you can contact me about the Emboss Resist Technique with Brayer. If you wish to order any of the supplies and try this for yourself, or if you would like to book a workshop and have me demonstrate the technique, you can contact me
|